Create a secure and documented API with Rust
- Published on

- Setup your Rust project
- Create the API CRUD
- Secure your API endpoints with an auth middleware
- Generate your documentation
- Checkout the full source code
In the digital age, APIs (Application Programming Interfaces) have become the cornerstone of software development, enabling applications to communicate with one another and share data in a seamless fashion. With the ever-growing reliance on these systems, security and documentation have emerged as critical components in API development. Rust, a modern programming language known for its focus on safety and performance, offers a compelling toolkit for building secure and well-documented APIs.
So, let's try to implement a complete API with CRUD features, secured by a Token validation and fully documented (swagger, redoc and rapidoc). You will be able to choose one of them or the three! For the example we will take MongoDB for the target datastore. Do not hesitate to replace MongoDB with any other in memory or database solution.
Setup your Rust project
- Create a New Project: Run the following command in your terminal to create a new project:
cargo new api-crud cd api-crud - Choose a Web Framework: There are several web frameworks available in Rust for building APIs, such as Actix-web, Rocket, and Warp. For this example, we'll use
Actix-webfor its performance and ease of use andutoipafor the API documentation (swagger, redoc and rapidoc) andopenssl,base64to create a token validation to secure our API. Add them to yourCargo.tomlfile:
[dependencies]
actix-web = { version = "4", features = ["openssl"] }
serde = { version = "1.0", features = ["derive"] }
serde_json = "1.0"
env_logger = "0.11.1"
log = "0.4"
futures = "0.3"
utoipa = {version="4.2.0", features = ["actix_extras"]}
utoipa-swagger-ui = { version = "6", features = ["actix-web"] }
utoipa-redoc = { version="3.0.0", features = ["actix-web"] }
utoipa-rapidoc = { version="3.0.0", features = ["actix-web"] }
mongodb = "2.0.0"
sha2 = { version = "0.10", default-features = false }
actix-cors ="0.7.0"
openssl = "0.10.32"
hex = "0.4"
base64 = "0.21.7"
Create the API CRUD
Below is a step-by-step guide on how to create your first API. This methodology focuses on creating an API with a well-organized structure, secure access, and automatic documentation.
Create a central config method to register the methods
- Create a new file for your API:
database.rs - For each API, you should centralize all your methods in a config method:
///
/// Configuration method for Object endpoints.
///
pub(super) fn configure(db: Data<Database>) -> impl FnOnce(&mut ServiceConfig) {
    |config: &mut ServiceConfig| {
        config
            .app_data(db)
            .service(get_by_key_value)
            .service(get_all)
            .service(create)
            .service(delete)
            .service(get_by_id)
            .service(update);
    }
}
This method will be typically called from your main function (main.rs):
  // This factory closure is called on each worker thread independently.
        App::new()
            .configure(database::configure(db.clone()))
Create the API methods
For each method, begin by outlining its purpose and detailing its intended function. Then, proceed to discuss the potential error scenarios that might occur when the method is executed. For each method that uses the utoipa library to annotate and document APIs, I will first describe the purpose and intended function of the method. Subsequently, I'll delve into various error scenarios that may arise during its execution.
The primary purpose of using method annotations with the utoipa library is to generate Swagger (OpenAPI) documentation for RESTful APIs in a web service. Developers use these annotations to describe endpoints, request parameters, response objects, status codes, and other relevant details that comprise an API's interface.
//
/// Get all objects from the collection by given path variable collection_name.
///
/// This endpoint supports mandatory authentication.
///
/// If storage does not contain any document status 200 will be returned with empty array.
/// If there is an error while fetching document 500 internal server error will be returned.
#[utoipa::path(
    responses(
        (status = 200, description = "List current object items in the collection_name", body = [Object]),
        (status = 401, description = "Unauthorized to get Object", body = ErrorResponse, example = json!(ErrorResponse::Unauthorized(String::from("missing token")))),
        (status = 500, description = "Internal server error", body = ErrorResponse, example = json!(ErrorResponse::InternalServerError(String::from("Failed to fetch documents"))))
    ),
    security(
        ("bearerAuth" = [])
    )
)]
#[get("/{collection_name}/get", wrap = "AuthToken")]
pub(super) async fn get_all(path: web::Path<String>, db: web::Data<Database>) -> impl Responder {
You can repeat this methodology for each method. You have probably noted the wrap = "AuthToken"in the method header. This element is key to secure your API.
Secure your API endpoints with an auth middleware
Middleware in the context of web development and APIs is a layer of software that sits between the client's request and the server's response. It operates in the middle of the request-response cycle, hence the name 'middleware'. This software layer provides a way to hook into the processing of requests and responses to perform various tasks such as logging, error handling, authentication, authorization, and more.
When securing an API, one common requirement is to ensure that only authenticated and authorized users can access certain endpoints. Token validation is a popular method used to achieve this.
Here’s how middleware can be used to secure an API by enforcing token validation:
A client makes a request to a protected API endpoint and includes their access token, typically in the Authorization header.
Middleware intercepts this incoming request before it reaches its intended function or API method.
The middleware extracts the token from the Authorization header.
The middleware validates the token to ensure it is not expired, has been issued by a trusted authority, is intended for use by this particular service (audience), and hasn't been tampered with (signature verification).
If there are roles or permissions encoded within the token, middleware may also check these claims against the requirements of the endpoint being accessed.
If validation fails for any reason (e.g., token is expired or invalid), middleware stops further processing of the request and responds with an appropriate error message (such as 401 Unauthorized or 403 Forbidden).
If validation succeeds, middleware allows execution to proceed to the actual function or API method that handles the request.
The function or API method executes with confidence that it is being accessed by an authenticated—and possibly authorized—user.
After executing its logic, response data flows back through any additional middleware layers before being sent back to the client.
In your main.rsfile, your can implement your Authentication Middleware:
/// AuthToken structure
struct AuthToken;

impl<S> Transform<S, ServiceRequest> for AuthToken
where
    S: Service<
        ServiceRequest,
        Response = ServiceResponse<actix_web::body::BoxBody>,
        Error = actix_web::Error,
    >,
    S::Future: 'static,
{
    type Response = ServiceResponse<actix_web::body::BoxBody>;
    type Error = actix_web::Error;
    type Transform = AuthMiddleware<S>;
    type InitError = ();
    type Future = Ready<Result<Self::Transform, Self::InitError>>;

    fn new_transform(&self, service: S) -> Self::Future {
        future::ready(Ok(AuthMiddleware {
            service,
        }))
    }
}

struct AuthMiddleware<S> {
    service: S,
}

//Auth Middleware
impl<S> Service<ServiceRequest> for AuthMiddleware<S>
where
    S: Service<
        ServiceRequest,
        Response = ServiceResponse<actix_web::body::BoxBody>,
        Error = actix_web::Error,
    >,
    S::Future: 'static,
{
    type Response = ServiceResponse<actix_web::body::BoxBody>;
    type Error = actix_web::Error;
    type Future = LocalBoxFuture<'static, Result<Self::Response, actix_web::Error>>;

    fn poll_ready(
        &self,
        ctx: &mut core::task::Context<'_>,
    ) -> std::task::Poll<Result<(), Self::Error>> {
        self.service.poll_ready(ctx)
    }

    fn call(&self, req: ServiceRequest) -> Self::Future {
	  //Implement your logic here
    }
}
The AuthToken middleware aims to handle authentication by checking for API Keys or Token signature.
Generate your documentation
Focus on Utoipa library
The utoipa library is a Rust crate designed to facilitate the creation of OpenAPI documentation for web services written in Rust. It integrates seamlessly with actix-web and warp web frameworks, allowing developers to define their REST API structure using code annotations that utoipa can interpret. These annotations are translated into OpenAPI specifications, which can then be used to generate interactive API documentation.
With utoipa, developers can annotate their routes, request and response structures with macros that specify details such as path parameters, query parameters, request bodies, responses, and content types. The library automatically generates an OpenAPI JSON or YAML document that describes the API's endpoints and their expected inputs and outputs.
One of the key features of utoipa is its ability to serve Swagger UI, ReDoc, and RapiDoc pages directly from a Rust application. This means that developers can provide real-time documentation for their APIs that can be used by frontend developers or API consumers to understand the capabilities of the service and test different endpoints interactively.
Implement utoipa in your main function
It is quite easy to reference your documentation entry point, and if you fill all the fields in your API header, your documentation will be generated automatically.
// This factory closure is called on each worker thread independently.
App::new()
	.wrap(cors)
	.configure(database::configure(db.clone()))
	.configure(auth::configure())
	.service(Redoc::with_url("/redoc", openapi.clone()))
	.service(
		SwaggerUi::new("/swagger-ui/{_:.*}").url("/api-docs/openapi.json", openapi.clone()),
	)
	// There is no need to create RapiDoc::with_openapi because the OpenApi is served
	// via SwaggerUi instead we only make rapidoc to point to the existing doc.
	.service(RapiDoc::new("/api-docs/openapi.json").path("/rapidoc"))
You should find your swagger: 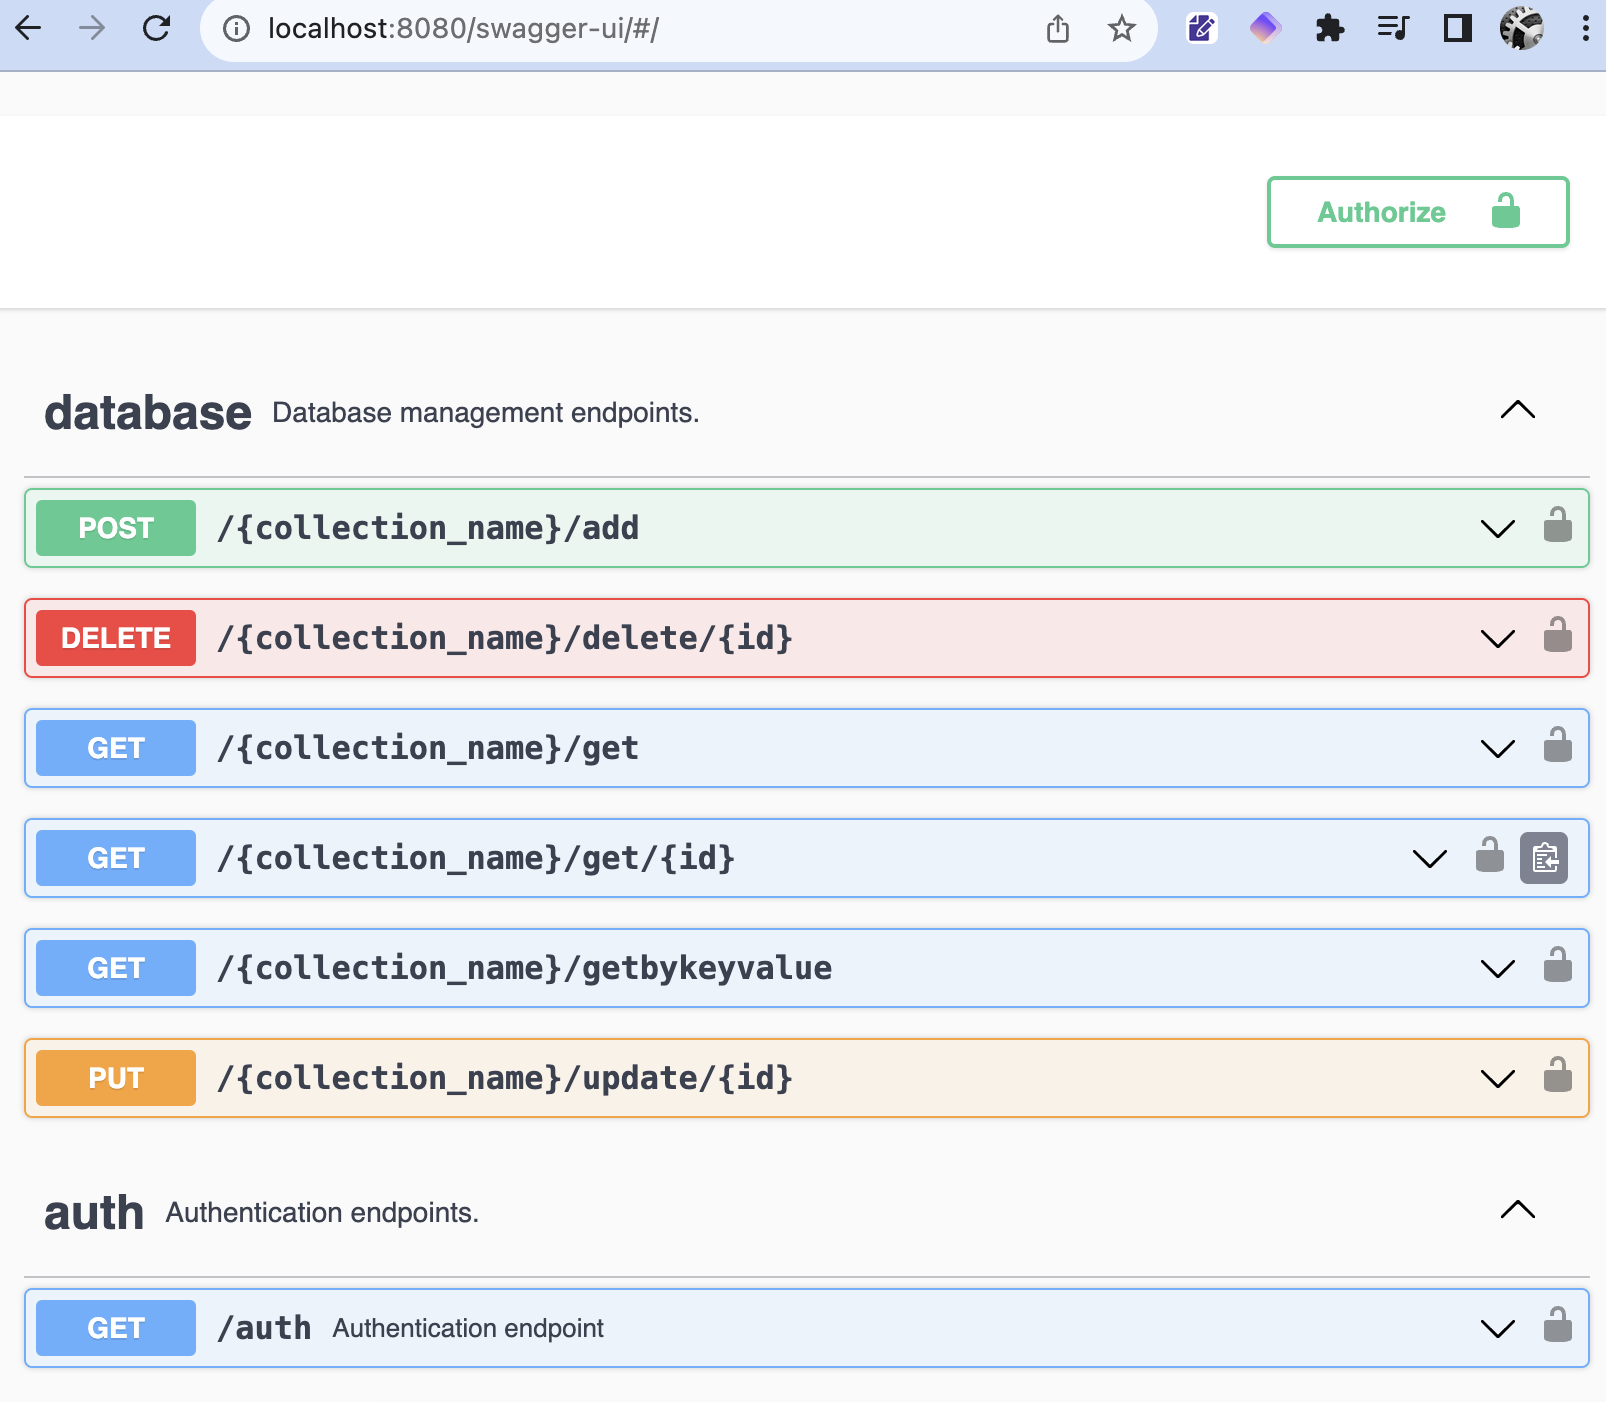
Your RapiDoc 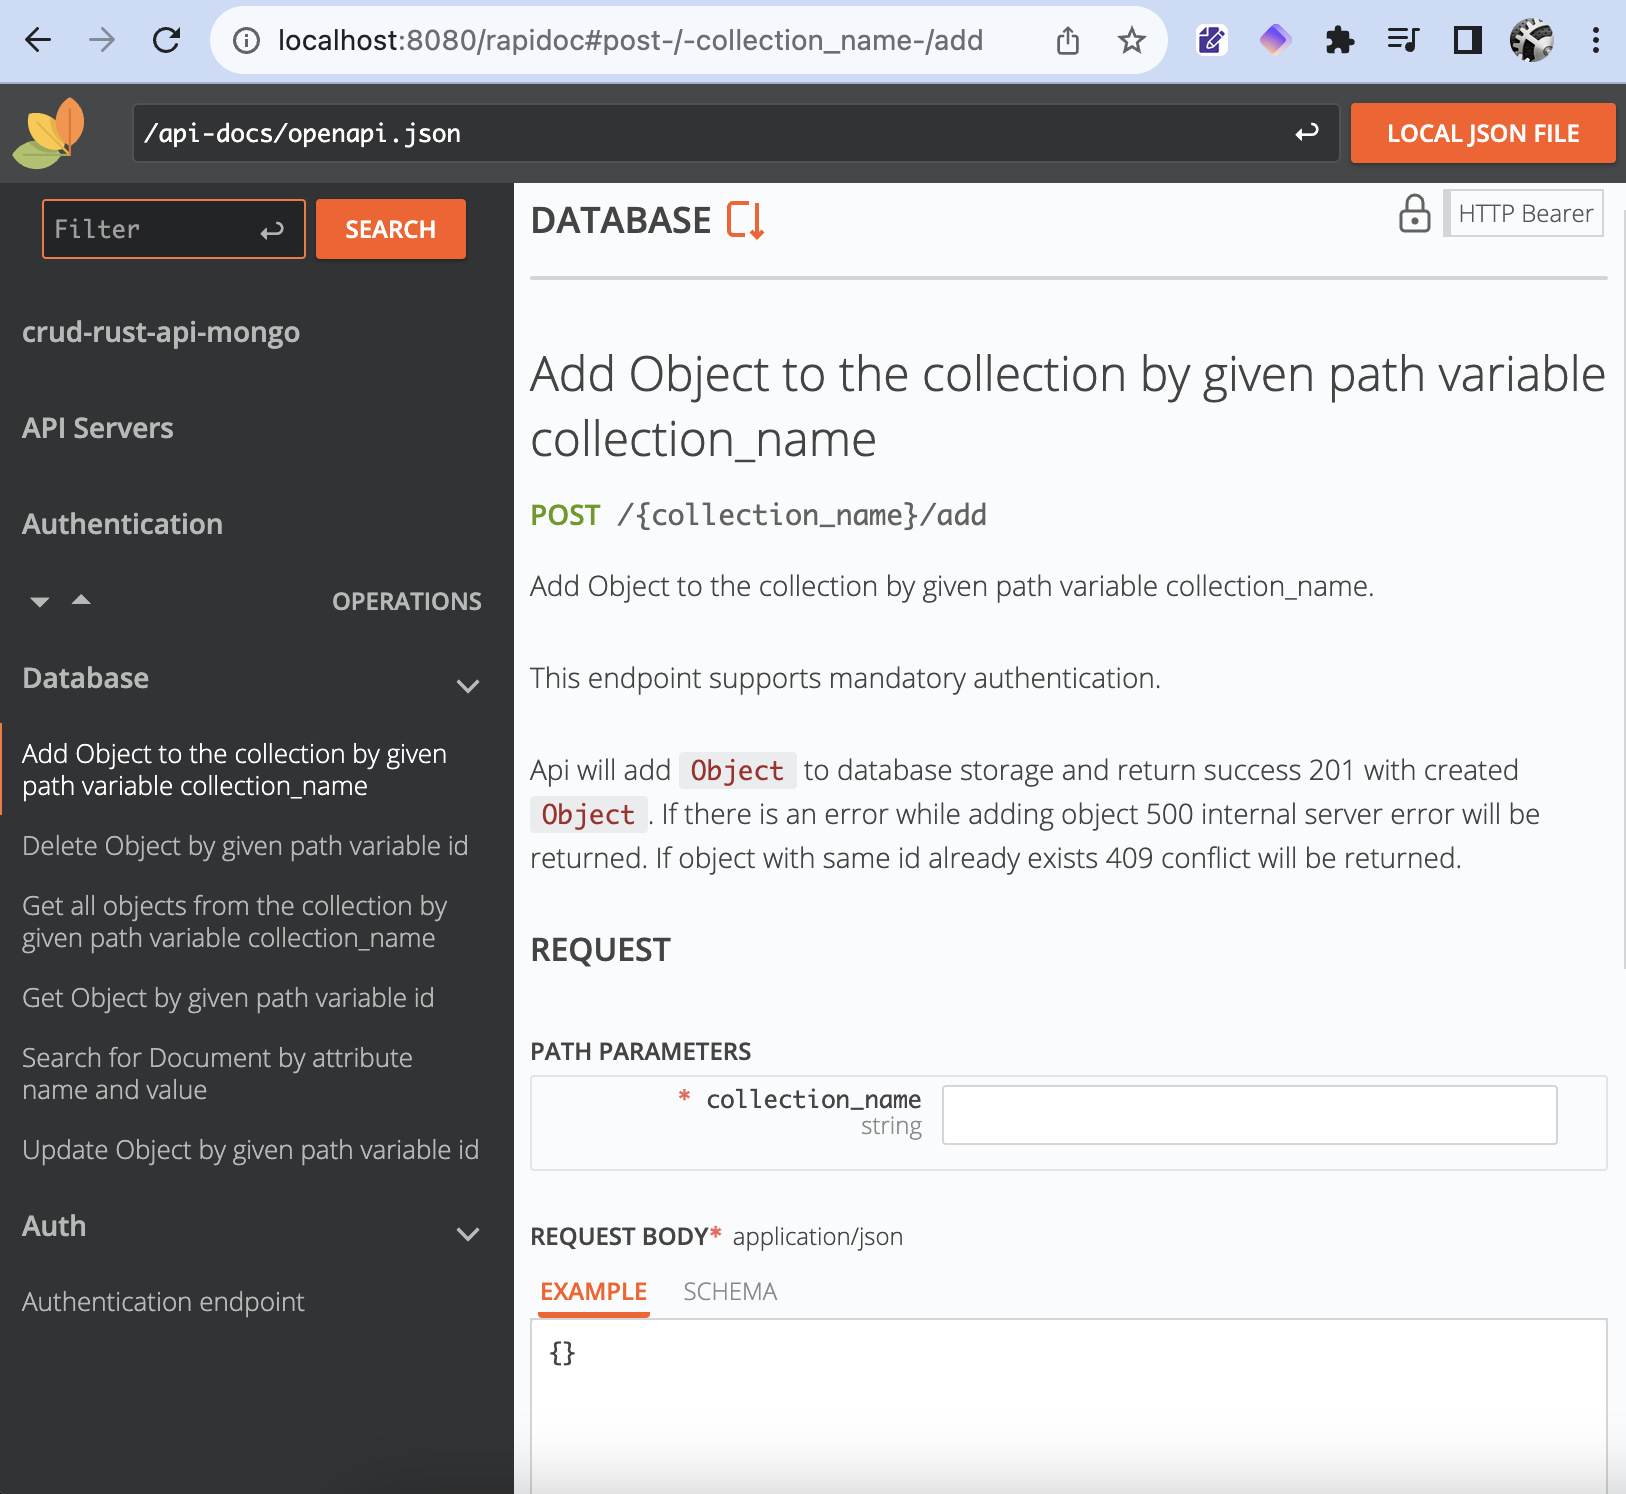
Your Redoc: 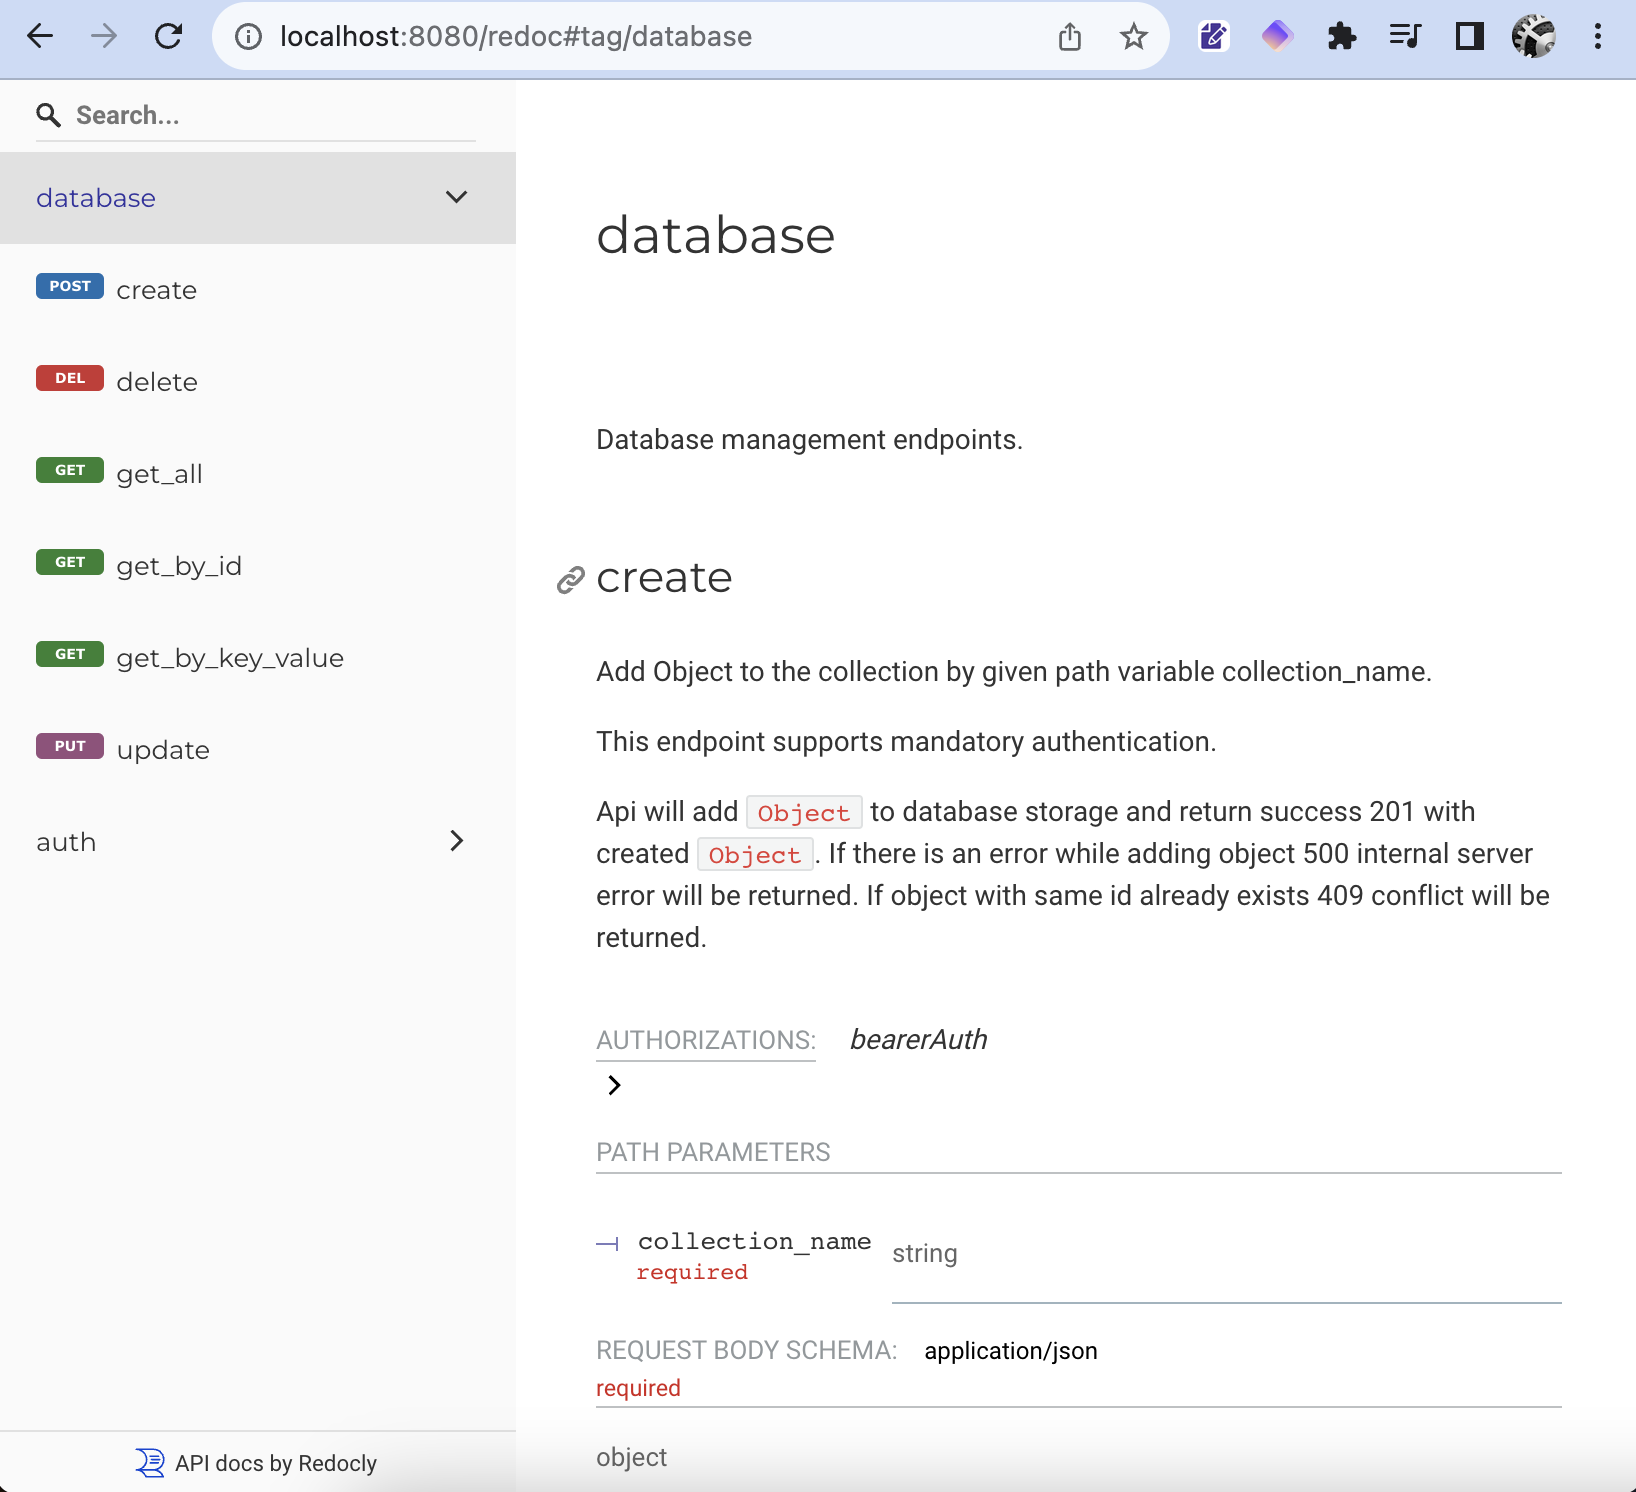
Checkout the full source code
Please find the full source code in my GitHub Repository: https://github.com/claziosi/crud-rust-api-mongo